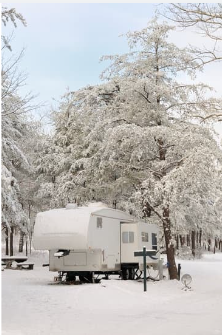
Essential RV Winterization Tips for a Safe and Cozy Off-Season
As the temperatures drop and winter approaches, it’s crucial to prepare your RV for the cold months ahead. Proper winterization can prevent damage from freezing temperatures, save you money on repairs, and ensure that your RV is ready for your next adventure in spring. Here are some essential tips to help you winterize your RV effectively.

1. Clean and Inspect
Before you dive into the winterization process, give your RV a thorough cleaning both inside and out. Remove any perishable food items and clean your refrigerator and
pantry. Don’t forget to inspect for leaks or damage during this cleaning. Check seals around windows and doors for any cracks or gaps that could let in moisture.
2. Drain the Water System
Water left in your pipes can freeze and cause serious damage. Here’s how to properly drain your RV’s water system:
- Drain Fresh Water Tank: Locate the drain valve and open it to let all the water out.
- Drain Water Heater: Be sure to turn off the water heater and allow it to cool down before draining it. Open the drain plug and let it empty completely.
- Empty Pipes: Open all faucets, including the shower, to let any remaining water drain out. Don’t forget the low-point drain valves.
3. Add Antifreeze
Once your water system is drained, it’s time to add RV antifreeze to prevent any residual water from freezing. Use only non-toxic RV antifreeze, which is safe for your plumbing.
Bypass the Water Heater: Ensure the water heater is bypassed before adding antifreeze to avoid filling it unnecessarily.
Pump Antifreeze: Use the RV’s water pump to pump antifreeze through all faucets and fixtures until you see pink fluid. Don’t forget to do this for the toilet and any outside showers.
4. Protect Your Battery
Batteries can be affected by cold weather, so it’s important to take care of them:
Disconnect and Remove: If possible, disconnect the battery and store it indoors where it’s warmer.
Charge Regularly: If you leave the battery in the RV, check it periodically and recharge it as necessary.
5. Check Tire Pressure
Cold temperatures can cause tire pressure to drop, so check your tire pressure before storing your RV. Inflate tires to the manufacturer’s recommended pressure to prevent
flat spots from forming over the winter.
6. Secure and Protect the Exterior
Cover Your RV: Use a breathable cover to protect your RV from snow, ice, and UV rays. Make sure it fits properly to avoid moisture buildup underneath.
Seal Openings: Check and seal any openings, including vents and windows, to prevent critters from making your RV their winter home.
7. Maintain the Interior
Use Moisture Absorbers: Place moisture absorbers or dehumidifiers inside the RV to prevent mold and mildew growth.
Leave Cabinets Open: Open cabinet doors under sinks to allow warm air to circulate and prevent pipes from freezing.
8. Consider Storage Options
If you have the option, storing your RV in a heated garage or facility is ideal. If you must park it outside, ensure it’s on a level surface and secure it properly.
9. Prepare for Spring
As winter ends, prepare for the return of your RV adventures:
- Inspect Everything: Check for any damage that may have occurred over the winter.
- Flush the System: Before hitting the road, flush the antifreeze out of your water system.
- Restock Supplies: Make sure you have all your essentials ready for your first trip back out.
CONCLUSION
Winterizing your RV may seem like a daunting task, but taking the time to do it right can save you headaches and expenses in the long run. With these tips, you can ensure
your RV is protected and ready for the next adventure when the warmer months return.
Happy winterizing!

